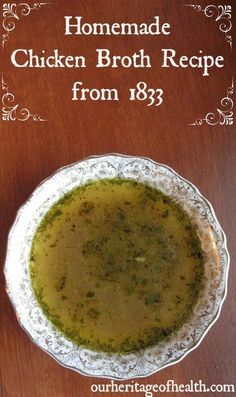
Old-Fashioned Chicken Broth: Nourishing, Savory, & Simple
There's a quiet magic that happens in a kitchen when a pot of chicken broth is gently simmering on the stove. The air fills with a comforting, savory aroma, a promise of warmth and nourishment. This isn't just about cooking; it's about connecting with a timeless culinary tradition, a simple act that yields incredible flavor and abundant goodness. If you've ever wondered how to make chicken broth that's truly golden, rich, and deeply satisfying, you're in for a treat. This old-fashioned method offers a two-for-one culinary triumph: a clean, full-bodied broth, and tender, cooked chicken ready for countless dishes.
Forget the cloudy, under-flavored store-bought versions. Crafting your own chicken broth from scratch is surprisingly straightforward, requires minimal effort once it’s simmering, and pays dividends in health benefits and culinary versatility. It's a foundational skill that elevates everything from weeknight dinners to gourmet creations, making it an indispensable part of any home cook's repertoire.
Why Embrace the Old-Fashioned Way to Make Chicken Broth?
The appeal of homemade chicken broth extends far beyond its superior taste. It's a mindful process that offers numerous benefits, making it a worthwhile ritual in any kitchen.
*
Unparalleled Flavor and Depth: Starting with a whole chicken or a generous mix of bone-in pieces, along with fresh vegetables and herbs, creates a complexity of flavor that simply cannot be replicated by bouillon cubes or processed broths. The slow extraction from bones and meat infuses the liquid with savory notes, gelatinous richness, and a clean finish that is truly distinctive.
*
Abundant Nourishment: Traditional chicken broth is often lauded for its nourishing properties. It's packed with vitamins, minerals, and collagen extracted from the bones and connective tissues. While not a miracle cure, a warm bowl of homemade broth can be incredibly comforting and supportive, especially during colder months or when feeling under the weather.
*
Efficiency and Zero Waste: This method is a masterclass in culinary efficiency. By gently poaching a whole chicken, you're not just making broth; you're also cooking a generous amount of tender chicken meat simultaneously. This means you end up with two incredible building blocks for future meals, ensuring nothing goes to waste and maximizing your efforts in the kitchen.
*
Cost-Effectiveness: Purchasing a whole chicken and a few staple vegetables is often more economical than buying multiple cartons of pre-made broth, especially when you factor in the additional cooked chicken meat you get from the process. It's smart cooking that respects your budget.
*
A Comforting Kitchen Aroma: There’s something uniquely comforting about the aroma of homemade chicken broth simmering on the stove. It transforms your kitchen into a sanctuary of warmth and promises delicious meals to come, making the entire experience feel deeply worthwhile.
The Essential Ingredients for a Stellar Broth
The beauty of old-fashioned chicken broth lies in its simplicity. High-quality, fresh ingredients are key to developing that rich, golden hue and profound flavor.
*
The Chicken: For the most flavorful and efficient broth, start with a
whole raw chicken (around 3-4 pounds). Alternatively, you can use 4 to 5 pounds of bone-in, skin-on chicken pieces like breasts, thighs, drumsticks, necks, or wings. The bones and connective tissues are crucial for flavor and gelatin, giving your broth that desirable body. If using a whole chicken, you can include the heart and gizzard, but it's best to discard the liver or save it for another purpose, as it can impart a strong, slightly bitter flavor to the broth. For an extra boost of collagen and body, consider adding a couple of chicken feet if you can find them – they work wonders!
*
Cold Water: This is a non-negotiable step. Always start with cold water to cover your chicken. Starting cold allows the proteins to gradually release, preventing the broth from becoming cloudy and encouraging a slow extraction of flavor. Using filtered water can also make a noticeable difference in the final taste of your broth.
*
Aromatics (Vegetables): While some cooks save vegetable scraps for broth, for the purest, cleanest flavor in an old-fashioned broth, fresh vegetables are preferred. Think of the classic mirepoix:
*
Onions: 1-2 large, quartered (no need to peel for broth, but removing the outer papery layer is fine).
*
Carrots: 2-3 medium, roughly chopped (peeling is recommended for a cleaner taste).
*
Celery: 2-3 stalks, roughly chopped.
* You can also add other root vegetables like a parsnip or a leek (white and light green parts only) for added depth.
*
Herbs and Spices: A simple collection of herbs provides a subtle, aromatic background without overpowering the chicken flavor.
*
Parsley stems: A small bunch (don't throw away the leaves, save them for garnish!).
*
Fresh Thyme: Several sprigs.
*
Bay Leaves: 2-3 dried bay leaves.
*
Black Peppercorns: 1 teaspoon, whole.
* Optional additions include a couple of smashed garlic cloves or even a few whole cloves for a unique warmth. To make removal easier, you can tie these ingredients into a "sachet" using cheesecloth and kitchen twine, or place them in a large tea ball. However, since the broth will be strained, simply adding them directly to the pot works perfectly well too.
Mastering the Art of Simmering: Your Step-by-Step Guide
Knowing how to make chicken broth involves a few key techniques that ensure a clear, flavorful, and nourishing result.
1.
Prepare Your Pot and Chicken
Select a large, heavy-bottomed stock pot or Dutch oven that can comfortably hold your chicken and water. Place the whole chicken or bone-in pieces into the pot.
2.
Add Cold Water to Cover
Pour cold water over the chicken until it's fully submerged, ensuring all components will cook evenly. Avoid overfilling the pot; leave some room for expansion.
3.
Initial Boil and Skimming
Place the pot over medium-high heat and slowly bring it to a boil. As it heats, you’ll notice foam and impurities rising to the surface. As soon as it reaches a rolling boil, immediately reduce the heat to low. Using a large spoon or a fine-mesh skimmer, carefully skim off all the foam and any visible impurities from the surface. This step is crucial for achieving a clear, clean-tasting broth. Continue to skim periodically for the first 30-60 minutes of simmering.
4.
Add Aromatics and Herbs
Once the initial skimming is done and the broth is gently simmering, add your prepared vegetables, herbs (either in a sachet or loose), and peppercorns to the pot.
5.
The Gentle Simmer
This is where the magic truly happens. Maintain a very low, gentle simmer – you should see only a few bubbles occasionally breaking the surface, not a vigorous boil. A gentle simmer prevents the broth from becoming cloudy, extracting flavors gradually without bitterness, and ensuring the chicken cooks gently. Partially cover the pot, leaving a small gap for steam to escape. Simmer for 2 to 4 hours, or until the chicken is fork-tender. If you prefer an even richer broth and plan to use just the bones for further extraction, you can remove the chicken meat after it’s cooked, return the bones to the pot, and continue simmering for another 2-4 hours.
6.
Remove Chicken and Cool
Once the chicken is tender and the broth has simmered sufficiently, carefully remove the whole chicken or pieces from the pot. Let the chicken cool slightly until it's comfortable to handle. Once cooled, separate the meat from the bones. Shred or dice the tender cooked chicken meat for use in various recipes, like chicken salad, tacos, or adding to soups.
7.
Strain the Broth
Strain the broth through a fine-mesh sieve, ideally lined with two layers of cheesecloth, into a large heat-proof bowl or another clean pot. This removes all solids, leaving you with a beautifully clear broth. Avoid pressing down on the solids as this can push fine particles through the sieve and make your broth cloudy. Discard the spent vegetables and bones (or compost them!).
8.
Cool and Store
Allow the broth to cool rapidly to a safe temperature. An ice bath (placing the pot of strained broth into a larger pot filled with ice water) can speed this process up. Once cool, transfer the broth to airtight containers. It can be stored in the refrigerator for 4-5 days or frozen for up to 6 months. Many find freezing in 1-cup portions helpful for future cooking. You'll likely notice a layer of fat solidify on top in the fridge; this acts as a natural seal and can be easily removed before reheating if desired.
Tips for the Perfect Old-Fashioned Broth
* **Patience is a Virtue:** Resist the urge to rush the simmering process. The low, slow cook is what builds incredible flavor.
* **Skim Diligently:** Don't skip the initial skimming step. It makes all the difference in achieving a clear, clean broth.
* **Season at the End:** Add salt and other seasonings *after* the broth has simmered and been strained. This prevents over-salting as the liquid reduces and allows you to adjust to taste.
* **Cold Water is Key:** Always, always start with cold water.
Beyond the Broth: Utilizing Your Culinary Gold
Now that you know how to make chicken broth, you have two invaluable culinary assets at your fingertips. Your homemade chicken broth is far more versatile than you might imagine:
*
Soups and Stews: The obvious choice! From classic chicken noodle to hearty vegetable stews, your broth will be the star.
*
Sauces and Gravies: Use it as the base for pan sauces, gravies, or creamy dishes, adding incredible depth.
*
Cooking Grains: Cook rice, quinoa, or couscous in chicken broth instead of water for an instant flavor upgrade.
*
Braising Liquids: An excellent liquid for braising meats or vegetables.
*
Sipping: Sometimes, the purest pleasure is simply sipping a warm mug of homemade broth.
And don't forget that tender, cooked chicken meat!
*
Chicken Salad: A classic use, perfect for sandwiches or lettuce wraps.
*
Tacos or Enchiladas: Shredded chicken is fantastic in Mexican-inspired dishes.
*
Casseroles and Pot Pies: A natural fit for comforting baked dishes.
*
Add to Soups: Incorporate the cooked chicken back into a soup made with your fresh broth.
For more insights into crafting broth that’s rich in flavor, efficient to make, and yields beautifully clear results, explore our guide on
Homemade Chicken Broth: Flavor, Efficiency, & Clear Results. To truly embrace the efficiency of this method, transforming a single pot into a foundation for multiple meals, dive into
Mastering Chicken Broth: One Pot, Two Meals, Pure Flavor.
Conclusion
Making old-fashioned chicken broth is more than just a recipe; it's an investment in your well-being and culinary prowess. It’s a rewarding process that fills your home with comforting aromas and your freezer with golden liquid gold. By understanding how to make chicken broth from scratch, you unlock a world of flavor, nourishment, and efficient meal preparation. Embrace this simple yet profound tradition, and savor the rich, savory difference it brings to your cooking. Your taste buds, and your family, will thank you.